This tutorial is one of four that put into practice concepts from Microservices March 2022: Kubernetes Networking:
- Reduce Kubernetes Latency with Autoscaling
- Protect Kubernetes APIs with Rate Limiting
- Protect Kubernetes Apps from SQL Injection (this post)
- Improve Uptime and Resilience with a Canary Deployment
Want detailed guidance on using NGINX for even more Kubernetes networking use cases? Download our free eBook, Managing Kubernetes Traffic with NGINX: A Practical Guide.
You work in IT for a popular local store that sells a variety of goods, from pillows to bicycles. They’re about to launch their first online store, but they asked a security expert to pen test the site before it goes public. Unfortunately, the security expert found a problem! The online store is vulnerable to SQL injection. The security expert was able to exploit the site to obtain sensitive information from your database, including usernames and passwords.
Your team has come to you – the Kubernetes engineer – to save the day. Luckily, you know that SQL injection (as well as other vulnerabilities) can be mitigated using Kubernetes traffic management tools. You already deployed an Ingress controller to expose the app and, in a single configuration, you’re able to ensure the vulnerability can’t be exploited. Now, the online store can launch on time. Well done!
Lab and Tutorial Overview
This blog accompanies the lab for Unit 3 of Microservices March 2022 – Microservices Security Pattern in Kubernetes, demonstrating how to use NGINX and NGINX Ingress Controller to block SQL injection.
To run the tutorial, you need a machine with:
- 2 CPUs or more
- 2 GB of free memory
- 20 GB of free disk space
- Internet connection
- Container or virtual machine manager, such as Docker, Hyperkit, Hyper-V, KVM, Parallels, Podman, VirtualBox, or VMware Fusion/Workstation
- minikube installed
- Helm installed
- A configuration that allows you to launch a browser window. If that isn’t possible, you need to figure out how to get to the relevant services via a browser.
To get the most out of the lab and tutorial, we recommend that before beginning you:
- Watch the recording of the livestreamed conceptual overview
- Review the background blogs, webinar, and video
- Watch the 16-minute video summary of the lab:
 
This tutorial uses these technologies:
- NGINX Open Source
- NGINX Ingress Controller (based on NGINX Open Source)
- BusyBox
- Helm
- minikube
- A simple app with security vulnerabilities, developed for this lab
The instructions for each challenge include the complete text of the YAML files used to configure the apps. You can also copy the text from our GitHub repo. A link to GitHub is provided along with the text of each YAML file.
This tutorial includes four challenges:
- Deploy a Cluster and Vulnerable App
- Hack the App
- Use an NGINX Sidecar Container to Block Certain Requests
- Configure NGINX Ingress Controller to Filter Requests
Challenge 1: Deploy a Cluster and Vulnerable App
In this challenge, you deploy a minikube cluster and install Podinfo as a sample app that has security vulnerabilities.
Create a Minikube Cluster
Deploy a minikube cluster. After a few seconds, a message confirms the deployment was successful.
Install the Vulnerable App
Here you deploy a simple e‑commerce app that consists of two microservices:
- A MariaDB database
- A PHP microservice that connects to the database and retrieves data
Perform these steps:
- Using the text editor of your choice, create a YAML file called 1-app.yaml with the following contents (or copy from GitHub).
- Deploy the app and API:
- Confirm that the Podinfo pods deployed, as indicated by the value
Runningin theSTATUScolumn. It can take 30–40 seconds for them to fully deploy, so wait until the status of both pods isRunningbefore continuing to the next step (reissuing the command as necessary). - Open the app in your browser:
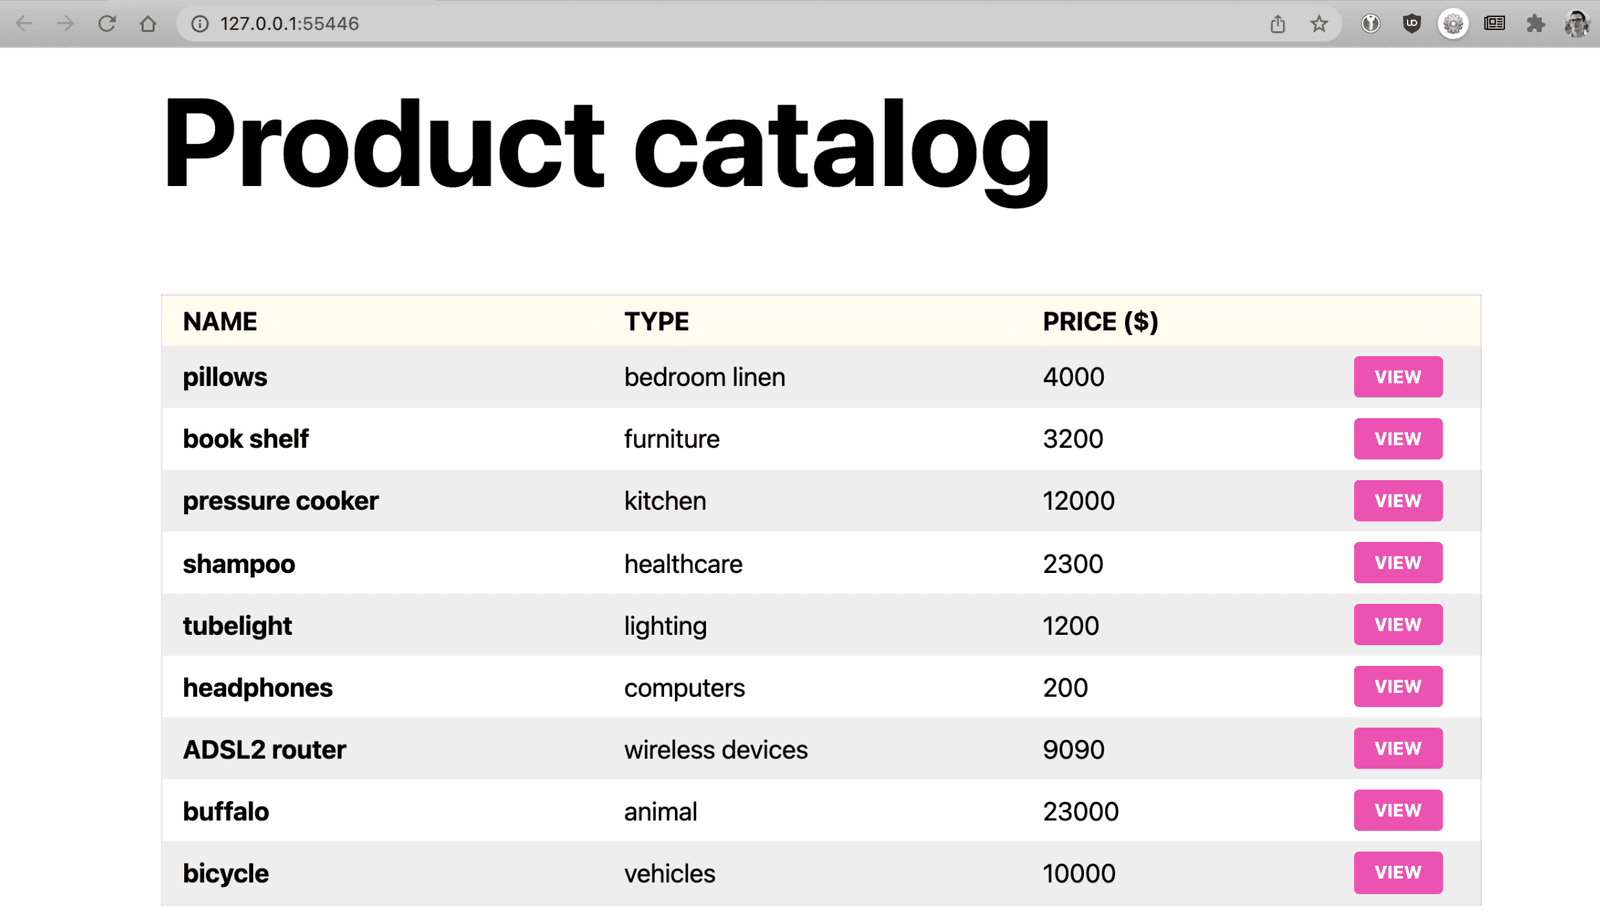
Challenge 2: Hack the App
The sample application is rather basic. It includes a homepage with a list of items (for example, pillows) and a set of product pages with details like a description and the price. The data is stored in the MariaDB database. Each time a page is requested, an SQL query is issued against the database.
- For the homepage, all items in the database are retrieved.
- For a product page, the item is fetched by ID.
When you open the pillows product page, you may notice the URL ends in /product/1. The 1 is the product’s ID. To prevent direct insertion of malicious code into the SQL query, it’s a best practice to sanitize user input before forwarding requests to backend services. But what if the app isn’t properly configured, and the input is not escaped before it’s inserted into the SQL query against the database?
Exploit 1
To find out whether the app is properly escaping input, run a simple experiment by changing the ID to one that doesn’t exist in the database.
Manually change the last element in the URL from 1 to -1. The error message Invalid product id "-1" indicates that the product ID is not being escaped – instead, the string gets inserted directly into the query. That’s not good unless you’re a hacker!
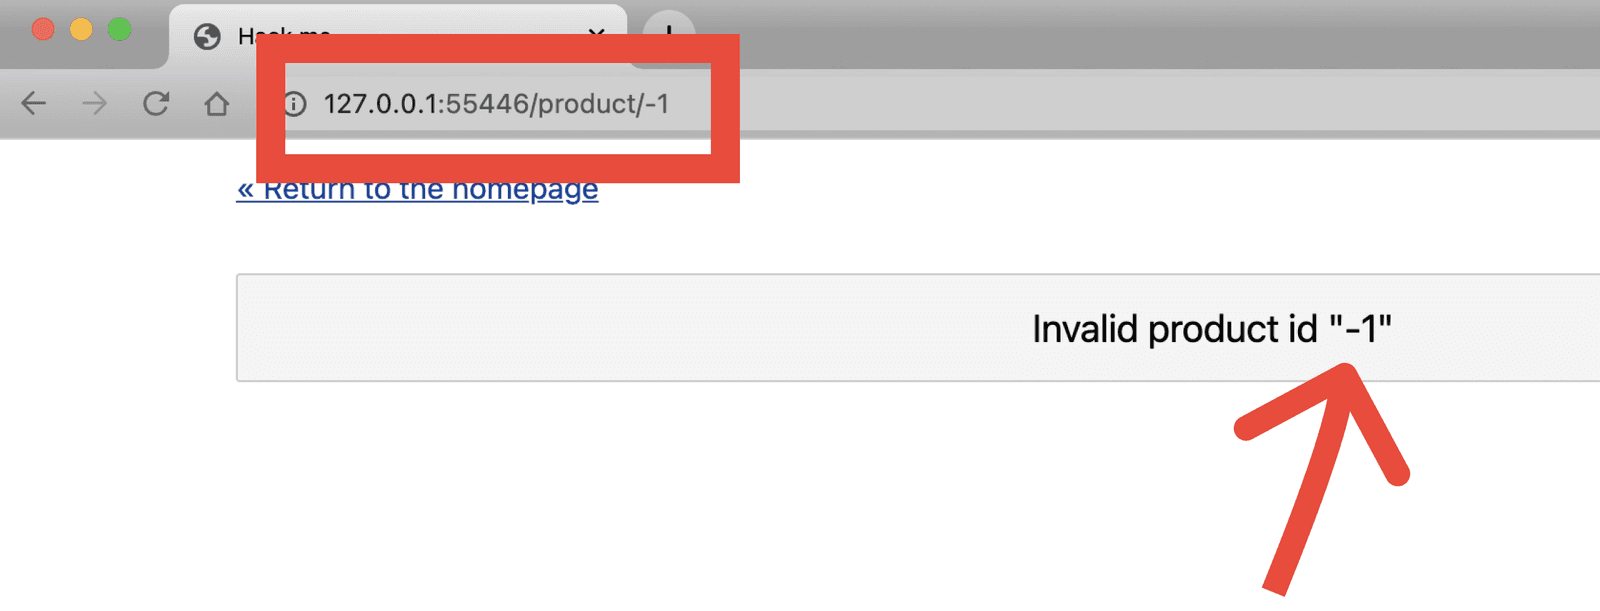
Assume the database query is something like:
To exploit the vulnerability caused by not escaping the input, replace 1 with -1" <malicious_query> -- // such that:
- The quotation mark (
") after-1completes the first query. - You can add your own malicious query after the quotation mark.
- The
--//sequence discards the rest of the query.
So, for example, if you change the final element in the URL to ‑1" or 1 -- //, the query compiles to:
This selects all rows from the database, which is useful in a hack. To find out if this is the case, change the URL ending to ‑1". The resulting error message gives you more useful information about the database:
Now, you can start manipulating the injected code in an attempt to order the database results by ID:
The result is the product page for the last item in the database.
Exploit 2
Forcing the database to order results is interesting, but not especially useful if hacking is your goal. Trying to extract usernames and password from the database is much more worth your while.
It’s safe to assume there’s a table of users in the database with usernames and passwords. But how do you extend your access from the products table to the users table?
The answer is by injecting code like this:
where
‑1"forces the return of an empty set from the first query.UNIONforces two database tables together – in this case, products and users – which enables you to obtain information (passwords) that isn’t in the original (products) table.SELECT*FROMusersselects all the rows in the users table.- The
--//sequence discards everything after the malicious query.
When you modify the URL to end in the injected code, you get a new error message:
This message reveals that the products and users tables don’t have the same number of columns, so the UNION instruction can’t be executed. But you can discover the number of columns through trial and error by adding columns (field names) one at a time as parameters to the SELECT instruction. A good guess at a field name in a users table is password, so try that:
The last query succeeds (telling you there are five columns in the users table) and you see a user password:
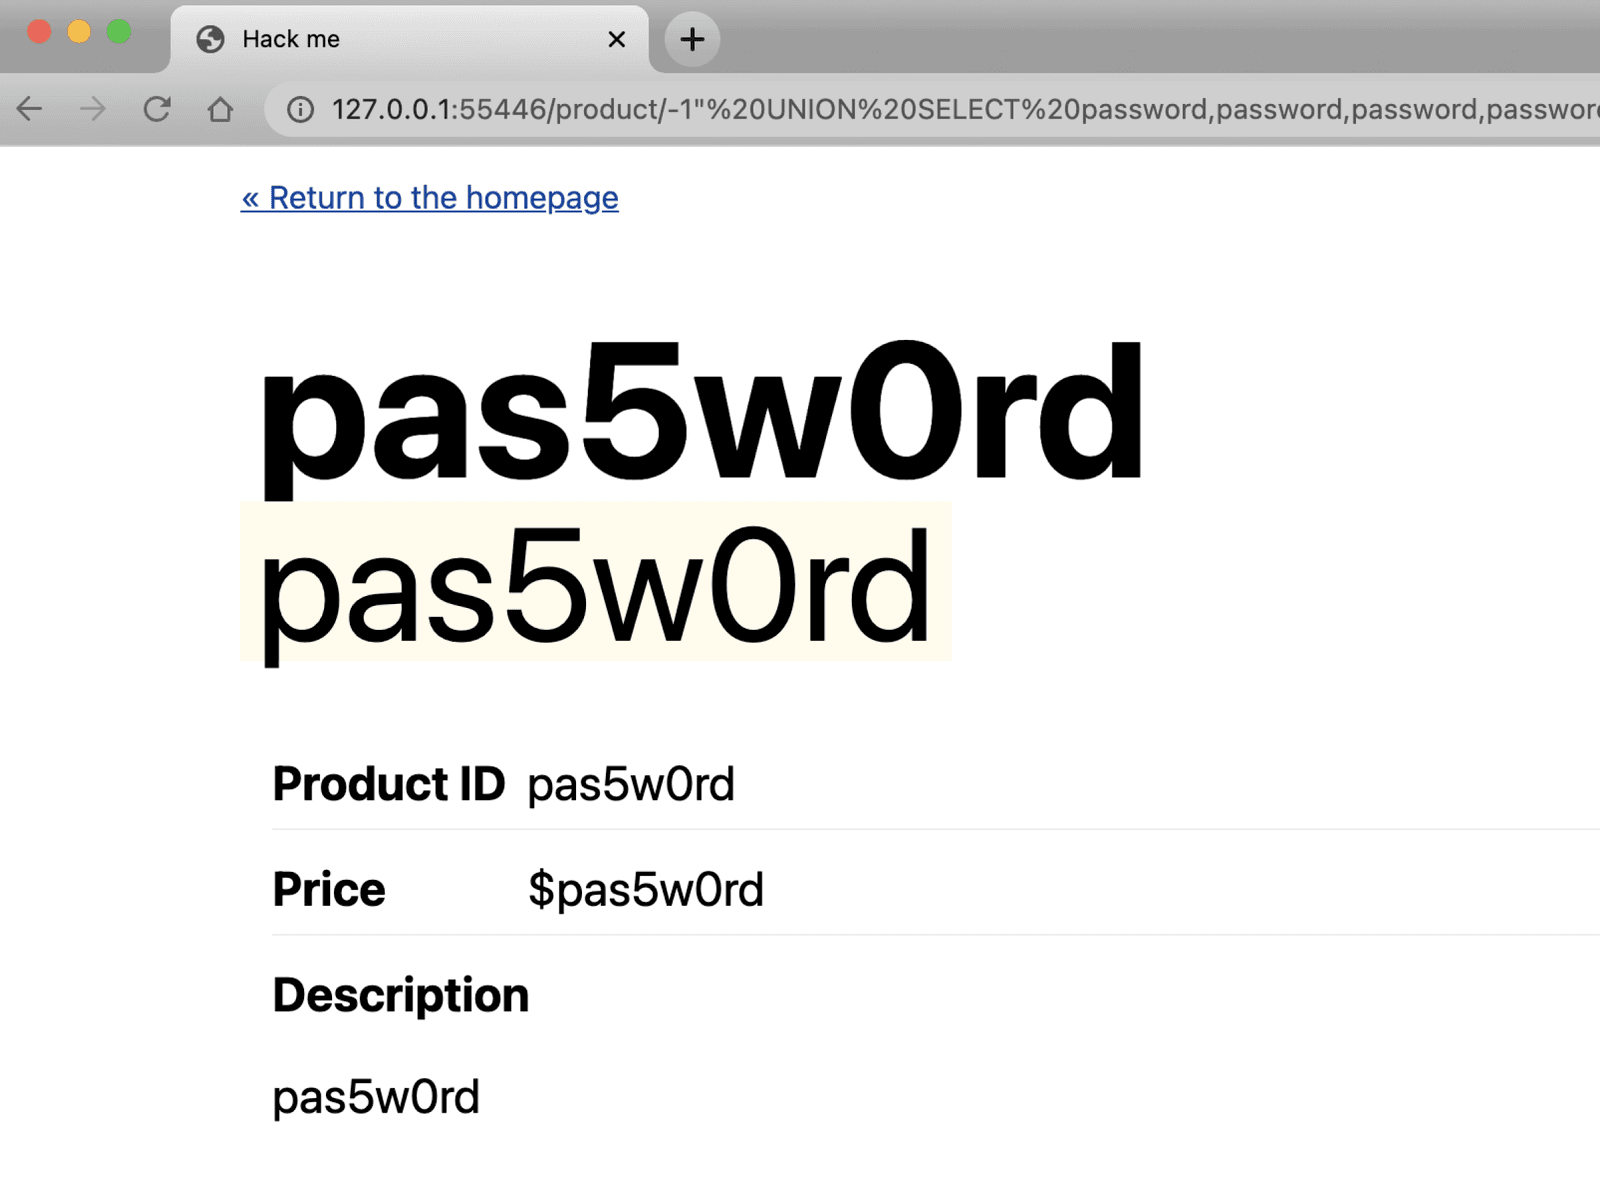
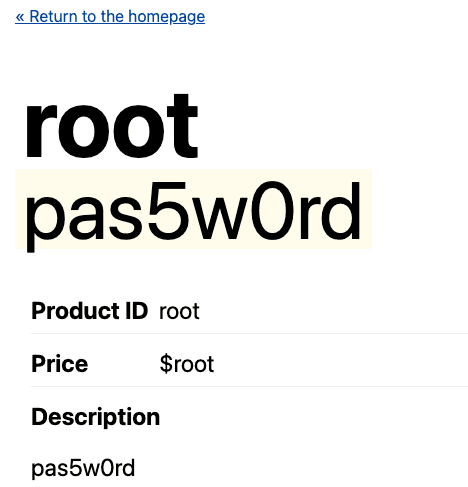
At this point you don’t know the username that corresponds to this password. But knowing the number of columns in the users table, you can use the same types of query as before to expose that information. Assume that the relevant field name is username. And that turns out to be right – the following query exposes both the username and password from the users table. Which is great – unless this app is hosted on your infrastructure!
Challenge 3: Use an NGINX Sidecar Container to Block Certain Requests
The developer of the online store app obviously needs to pay more attention to sanitizing user input (such as use of parameterized queries), but as a Kubernetes engineer you can also help prevent SQL injection by blocking the attack from reaching the app. That way, it doesn’t matter as much that the app is vulnerable.
There are many ways to protect your apps. For the rest of this lab, we focus on two:
- In this challenge, you inject a sidecar container in the pod to proxy all traffic and deny any request that has
UNIONin the URL. First deploy NGINX Open Source as a sidecar and then test whether it filters out malicious queries. Note: We’re leveraging this technique for illustrative purposes only. In reality, manually deploying proxies as sidecars isn’t the best solution (more on that later). - In Challenge 4, we use NGINX Ingress Controller to filter all traffic entering the cluster.
Deploy NGINX Open Source as a Sidecar
- Create a YAML file called 2-app-sidecar.yaml with the following contents (or copy from GitHub). Important aspects of the configuration include:
- A sidecar container running NGINX Open Source is started on port 8080.
- NGINX forwards all traffic to the app.
- Any request that includes (among other character strings)
SELECTorUNIONis denied (see the firstlocationblock in theConfigMapsection). - The service for the app routes all traffic to the NGINX container first.
- Deploy the sidecar:
Test the Sidecar as a Filter
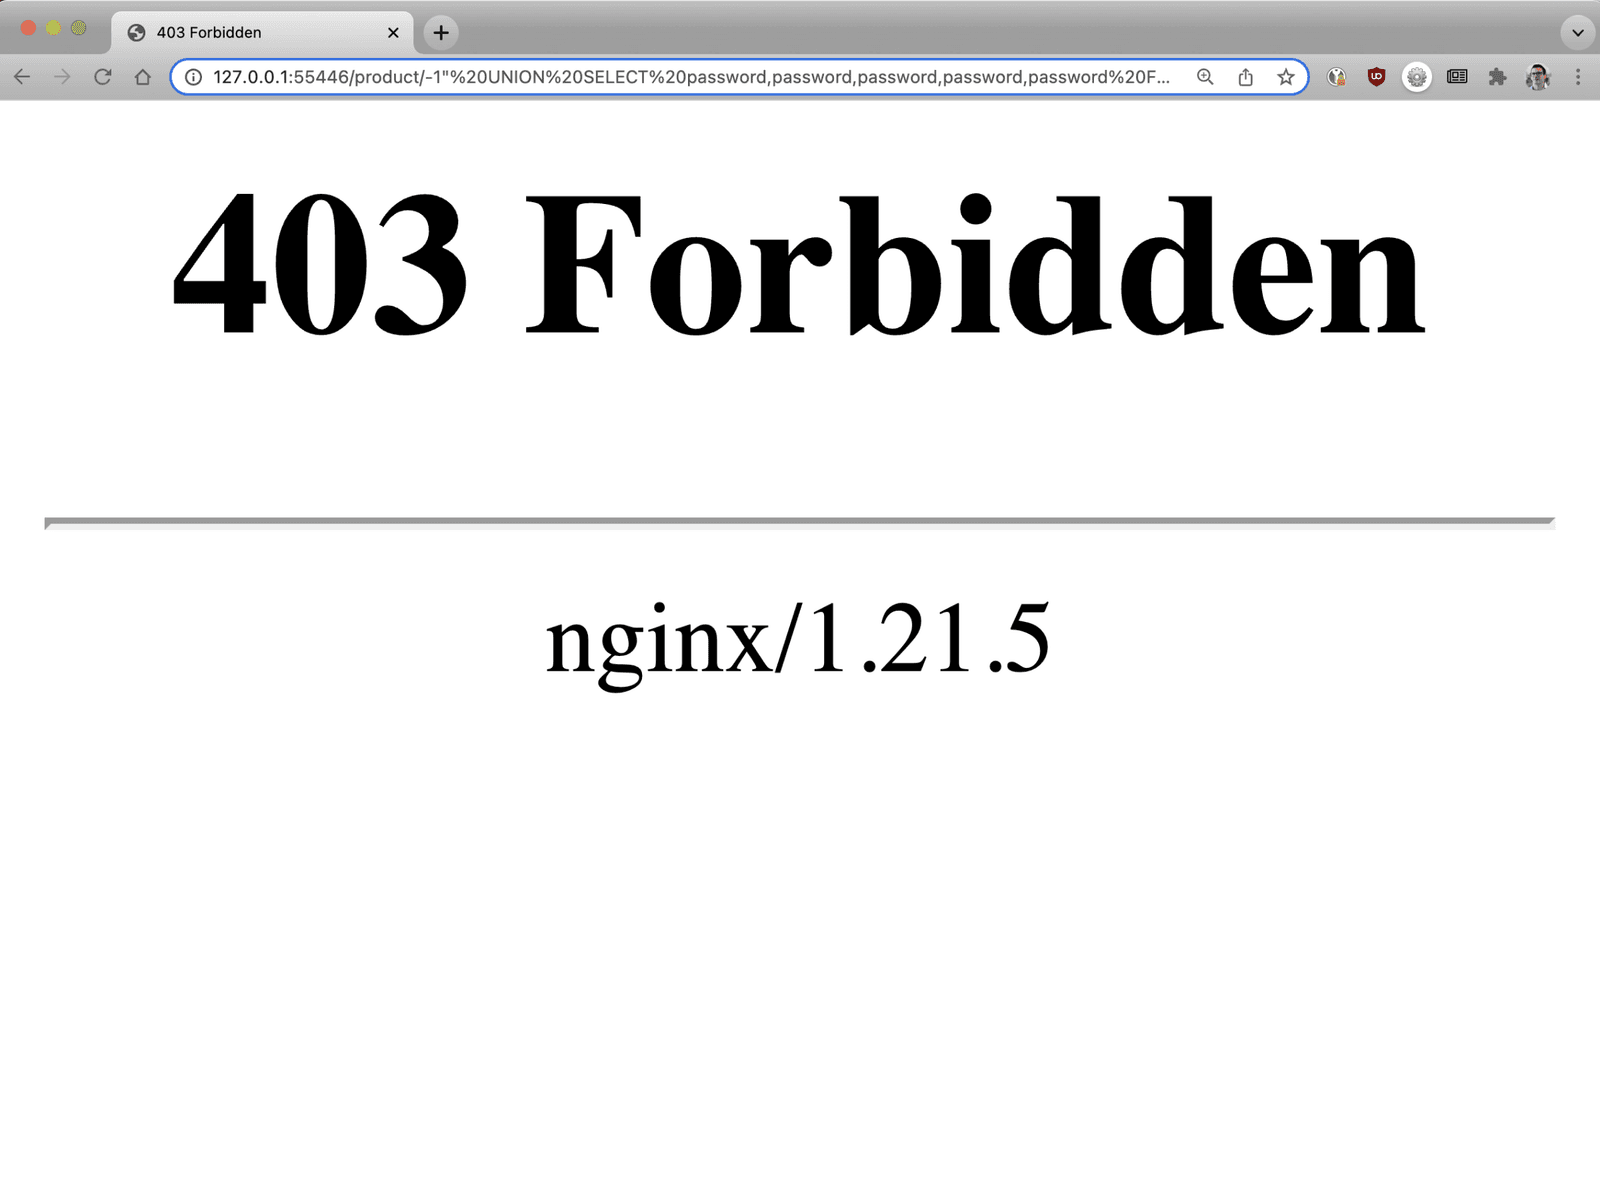
Test whether the sidecar is filtering traffic by returning to the app and trying the SQL injection again. NGINX blocks the request before it reaches the app!
Challenge 4: Configure NGINX Ingress Controller to Filter Requests
Protecting your app as in Challenge 3 is interesting as an educational experience, but we don’t recommend it for production because:
- It is not a full security solution.
- It is not scalable (you can’t easily apply this protection to multiple apps).
- Updating it is complicated and inefficient.
A much better solution is using NGINX Ingress Controller to extend the same protection to all of your apps! Ingress controllers can be used to centralize all kinds of security features, from blocking requests like a web application firewall (WAF) does to authentication and authorization.
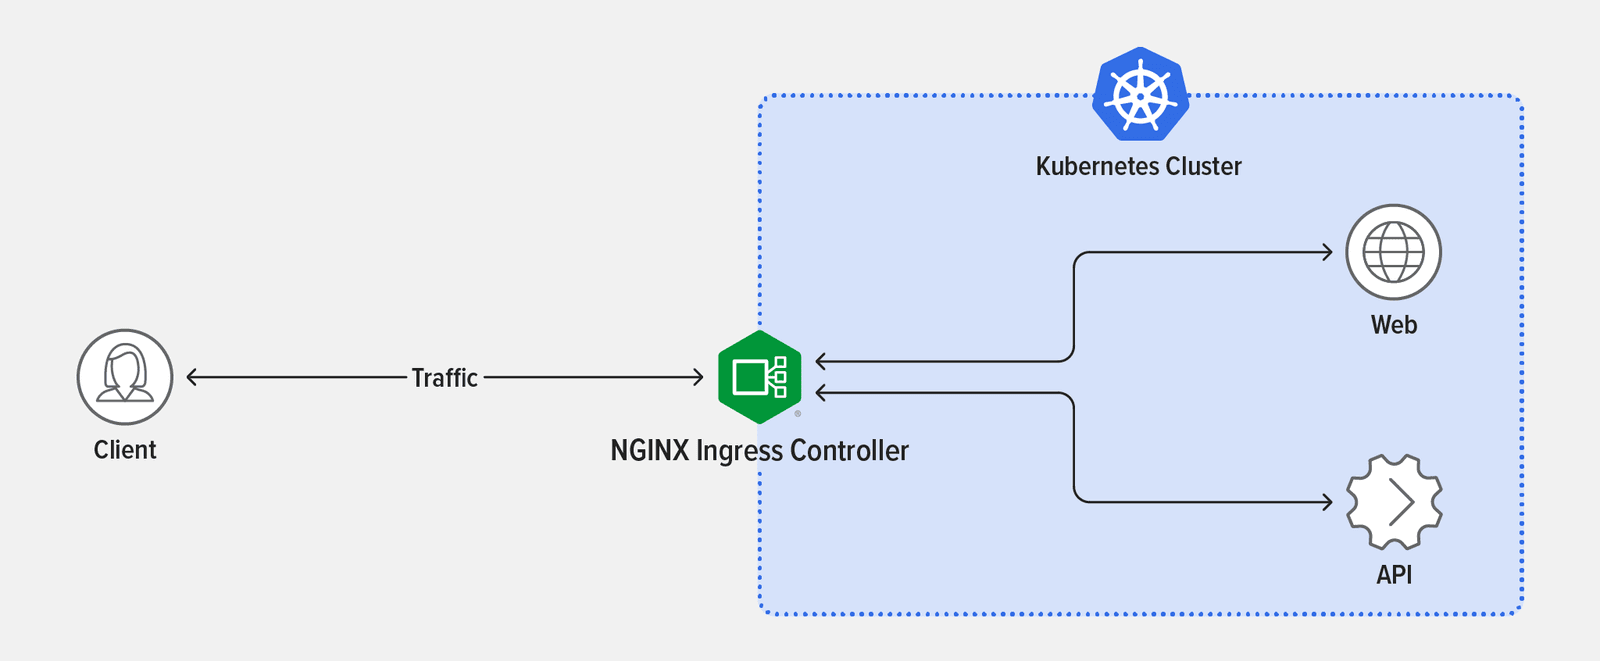
In this challenge, you deploy NGINX Ingress Controller, configure traffic routing, and verify that the filter blocks the SQL injection.
Deploy NGINX Ingress Controller
The fastest way to install NGINX Ingress Controller is with Helm.
- Add the NGINX repository to Helm:
- Download and install the NGINX Open Source‑based NGINX Ingress Controller, which is maintained by F5 NGINX. Note the
enableSnippets=trueparameter: snippets are used to configure NGINX to block the SQL injection. The final line of output confirms successful installation. - Confirm that the NGINX Ingress Controller pod deployed, as indicated by the value
Runningin theSTATUScolumn.
Route Traffic to Your App
- Create a YAML file called 3-ingress.yaml with the following contents (or copy from GitHub). It defines the Ingress manifest required to route traffic to the app (not through the sidecar proxy this time). Notice the
annotations:block where a snippet is used to customize the NGINX Ingress Controller configuration with the samelocationblock as in the ConfigMap definition in Challenge 3: it rejects any request that includes (among other character strings)SELECTorUNION. - Deploy the Ingress resource:
Verify Filter Operation
- Launch a disposable BusyBox container to issue a request to the NGINX Ingress Controller pod with the correct hostname.
- Attempt the SQL injection. The
403Forbiddenstatus code confirms that NGINX blocks the attack!
Next Steps
Kubernetes is not secure by default. An Ingress controller can mitigate SQL injection (and many other) vulnerabilities. But keep in mind that the kind of WAF‑like functionality you just implemented with NGINX Ingress Controller does not replace an actual WAF, nor is it a replacement for securely architecting apps. A savvy hacker can still make the UNION hack work with some small changes to the code. For more on this topic, see A Pentester’s Guide to SQL Injection (SQLi).
That said, an Ingress controller is still a powerful tool for centralizing most of your security, leading to greater efficiency and security including centralized authentication and authorization use cases (mTLS, single sign‑on) and even a robust WAF like F5 NGINX App Protect WAF.
The complexity of your apps and architecture might require more fine‑grained control. If your organization requires Zero Trust and end-to-end encryption, consider a service mesh like the always‑free F5 NGINX Service Mesh to control communication between services in the Kubernetes cluster (east‑west traffic). We explore service meshes in Unit 4, Advanced Kubernetes Deployment Strategies.
For details on obtaining and deploying NGINX Open Source, visit nginx.org.
To try the NGINX Ingress Controller based on NGINX Plus with NGINX App Protect, start your free 30-day trial today or contact us to discuss your use cases.
To try the NGINX Ingress Controller based on NGINX Open Source, see NGINX Ingress Controller Releases at our GitHub repo or download a prebuilt container from DockerHub.
About the Author
Related Blog Posts

Secure Your API Gateway with NGINX App Protect WAF
As monoliths move to microservices, applications are developed faster than ever. Speed is necessary to stay competitive and APIs sit at the front of these rapid modernization efforts. But the popularity of APIs for application modernization has significant implications for app security.
How Do I Choose? API Gateway vs. Ingress Controller vs. Service Mesh
When you need an API gateway in Kubernetes, how do you choose among API gateway vs. Ingress controller vs. service mesh? We guide you through the decision, with sample scenarios for north-south and east-west API traffic, plus use cases where an API gateway is the right tool.
Deploying NGINX as an API Gateway, Part 2: Protecting Backend Services
In the second post in our API gateway series, Liam shows you how to batten down the hatches on your API services. You can use rate limiting, access restrictions, request size limits, and request body validation to frustrate illegitimate or overly burdensome requests.
New Joomla Exploit CVE-2015-8562
Read about the new zero day exploit in Joomla and see the NGINX configuration for how to apply a fix in NGINX or NGINX Plus.
Why Do I See “Welcome to nginx!” on My Favorite Website?
The ‘Welcome to NGINX!’ page is presented when NGINX web server software is installed on a computer but has not finished configuring